|
Wow, it’s Friday already and I’ve had a great week. I posted about my #lockdownamichallenge in the Crochet UK FB group and the “YARN and CRAFTS FROM ALDI & LIDL - chatter group” on FB and I received so much love and encouragement from the lovely people who hang out there. Several have ordered there own Aldi Amigurumi Box of yarn - I think the selection of bright colours really appeals on these dreary November lockdown days. If you’re a crochet addict there’s lots of inspiration, encouragement and support to be found in both of these FB Groups.
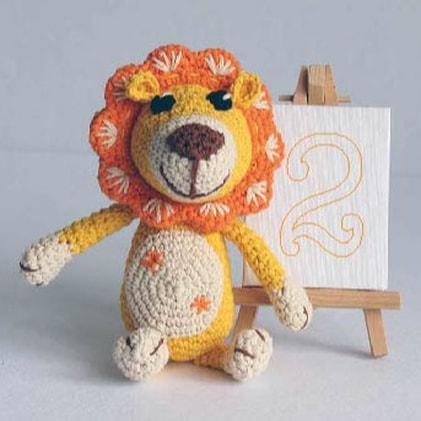
So - with so many lovely suggestions for creatures to create I’ve cracked on with #mycrochetchums and got my second design done - a cheery little Lion - you can find the pattern here.
Several people have asked me what the Aldi Amigurumi Yarn is like to work with. Well to be honest it’s better quality than I expected having never bought Aldi yarn before and given the price. It is very matt - I usually use Scheepjes Catona which is smoother as it has a sheen - but I like that for a change. It’s described as “Light” on the box - pretty much equivalent to DK I think, so the stitches are plumper than I’m used to (Catona is 4ply) but I like the finished effect a lot.
One thing a few people have mentioned is that the yarn splits a lot - I found it did so with a 2mm hook but was a lot better behaved when I moved up to a 3mm hook so it’s worth playing around with and finding what works for you. The main thing is to make sure the stitches sit snuggly enough together to stop the stuffing showing through
Of course - if you want to have a go at the Lion (or Frog!) pattern, you don’t have to use the Aldi yarn - the patterns will work ok with something different. If I used Scheepjes Catona I’d still use a 3mm hook but the finished character would come out slightly smaller. When I get a chance I’ll make one of them up in several different yarns and post about how they compare.
If any one does use one of the patterns I’d LOVE to see the finished results - you can post a pic on the “mycrochetchums” FB page.
I’m starting on design No 3 tonight - I think I have an idea of what the next character’s going to be but sometimes something completely different will come out of the end of my hook!
Wishing everyone a great weekend and Happy Crocheting whatever you’re making!
0 Comments
Leave a Reply. |
AuthorI'm Pia and I'm an Amigurumi Addict! ArchivesApril 2021 Categories RSS Feed RSS Feed
|
- home
- Free Patterns
- SHOP
-
Hints & Tips
- Christmas Wreath Hints & Tips >
- Embroidering an Amigurumi Smile
- Sewing together seamlessly tutorial
- Hiding Yarn Tails Photo Tutorial
- Resizing an Amigurumi Pattern
- Assembling Amigurumi Using Pin Lines
- Perfect Stripes Photo Tutorial
- Scrap Yarn Stitch Marker Photo Tutorial
- Checking Tension/Gauge
- UK Abbreviations
- US Abbreviations
- UK/US Crochet Terms
- Oval Start Photo Tutorial
- Bendable Knee for Amigurumi Photo Tutorial
- Magic Ring Photo Tutorial
- Amigurumi Toes Photo Tutorial
- Ami Claws Photo Tutorial
- About
- Contact Me
- FAQs
- T&Cs Privacy
Powered by  Create your own unique website with customizable templates.
 Create your own unique website with customizable templates.

