How to Crochet Perfect Stripes in Amigurumi
Photo Tutorial for Clean Colour Changes in the Round

Jogless Stripes - easy once you know how!
I'm going to show you how to do an invisible colour change in Amigurumi - without the frustrating "jog" or "step" between colours. This is achieved by working in joined rounds rather than a continuous spiral.
This tutorial shows you:
Although this technique is easy once you've got the hang of it, if you're very new to Amigurumi Crochet, you'll get better results if you make a few pieces first using the conventional continuous spiral method and don't worry about the "jog" between colours just yet. Once you're comfortable with the basics and your hands are used to handling the hook and yarn and have developed muscle memory for the actions, then move on to techniques like this to improve the finish of your makes.
This tutorial shows you:
- How to practice the technique using a basic pattern.
- How to join at the end of Rnd 1.
- How to start the next rounds.
- How to join the following rounds (it's slightly different to Rnd 1!)
- When and how to introduce a different colour.
Although this technique is easy once you've got the hang of it, if you're very new to Amigurumi Crochet, you'll get better results if you make a few pieces first using the conventional continuous spiral method and don't worry about the "jog" between colours just yet. Once you're comfortable with the basics and your hands are used to handling the hook and yarn and have developed muscle memory for the actions, then move on to techniques like this to improve the finish of your makes.
Basic Pattern
Rather than jumping straight into working the technique on an Amigurumi project, I suggest you take the time to have a quick practice first by crocheting along with me through the tutorial.
Pick a couple of different colour yarns - make your life easy and chose the same weight yarn for both, ideally in light (but contrasting) colours- and grab a hook.
My example was created with 4 ply (US Sport) Cotton and a 3mm hook.
Top Tip: Don't go too small on the hook size while you're practising - it's easier to see where (and where not) to insert the hook if your stitches are a little bigger - you can go smaller once you've got the hang of the technique.
You'll be working the pattern below. It uses UK Crochet Terms. They are not the same as US Terms. UK dc and US dc are two different things, if you're used to US Terms you'll need to work sc - single crochet - everywhere this pattern says dc - don't worry, I'll remind you as we work through the stages.
|
Rnd 1: With COL A and working into a magic ring, 6 dc, join. 6 sts
Rnd 2: 2 dc in each st around, join. 12 sts Rnd 3: [1 dc, 2 dc in next st] 6 times, join. 18 sts Rnd 4: [2 dc, 2 dc in next st] 6 times, join. 24 sts Change to COL B. Rnd 5: [3 dc, 2 dc in next st] 6 times, join. 30 sts Rnd 6: [4 dc, 2 dc in next st] 6 times, join. 36 sts Change to COL A. Rnd 7: [5 dc, 2 dc in next st] 6 times, join. 42 sts Rnd 8: [6 dc, 2 dc in next st] 6 times, join. 48 sts Change to COL B. Rnd 9: [7 dc, 2 dc in next st] 6 times, join. 54 sts Rnd 10: [8 dc, 2 dc in next st] 6 times, join. 60 sts Fasten off. |
Joining the First Round
Rnd 1: With COL A and working into a magic ring, 6 dc, join. 6 sts - don't forget, it's sc if you're using US terms!

Fig 1: Identifying the BLO of the beginning stitch
|

Fig 2: Completed slip stitch through BLO of beginning stitch
|
Join the end of the round to its start by working a slip stitch into the back loops only (BLO) of the beginning dc (US sc) of the round. (Figs 1 & 2)
Starting Rnd 2
Rnd 2: 2 dc in each st around, join. 12 sts - don't forget, it's sc if you're using US terms!

Fig 3: First completed stitch of Rnd 2
To start the second round, you will now work the first dc (US sc) through both loops of the same first stitch of Rnd 1 that you've just worked the slip stitch into. (Fig 3). Make this first dc (US sc) and then, as the instructions are telling you to make two dc (US sc) in each st around, make the second stitch by working through both loops of the first dc of Rnd 1 too.
To recap - you will now have worked one sl st in the BLO and two dc (US sc) in both loops of the same first dc of Rnd 1.
To complete Rnd 2, work 2 dc (US sc) in each of the remaining 5 stitches, to give a total of 12 stitches at the end of the round.
To recap - you will now have worked one sl st in the BLO and two dc (US sc) in both loops of the same first dc of Rnd 1.
To complete Rnd 2, work 2 dc (US sc) in each of the remaining 5 stitches, to give a total of 12 stitches at the end of the round.
Joining Rnd 2

Fig 4: Identifying the slip stitch from the previous round
To join Rnd 2 - and all subsequent rounds - you need to make sure you skip over the slip stitch from the previous round and again, join with a slip stitch into the BLO of the first dc (US sc) of the round.
As you can see from Fig 4 above, the slip stitch sits a little lower than the rest of the stitches in the round, which helps you identify it. If in doubt, count back around Rnd 2, to work out which is the first stitch.
Don't work into the slip stitch rather than the beginning dc by mistake. The sl st joins do not count in the stitch count for each rnd.
Working Rnd 3
Rnd 3: [1 dc, 2 dc in next st] 6 times, join. 18 sts - don't forget, it's sc if you're using US terms!
If you are practicing the technique by crocheting along with me, you now need to work Rnd 3, again skipping over the slip stitch from the previous round and joining with a slip stitch into the BLO of the first dc (US sc) of the round.
Working Rnd 4 and Changing Colour
Rnd 4: [2 dc, 2 dc in next st] 6 times, join. 24 sts - don't forget, it's sc if you're using US terms!
Change to COL B.
Change to COL B.

Fig 5: Tie new colour onto working yarn - the working end of both colours is in my left hand
|

Fig 6: The last stitch of Rnd 4 completed with the new colour
|
Now you can work Rnd 4. At the end of Rnd 4 you need to change to COL B. Work the last stitch of the round up to just before its last yrh (US yoh) . Tie the new colour to the working yarn, (Fig 5) but slide the knot right up so it's sitting snuggly behind the work.
Don't cut or fasten off COL A - in this instance it can just be carried up on the back of the work.
Yarn round hook with new COL B and pull through to complete the last dc (US sc). (Fig 6)
Don't cut or fasten off COL A - in this instance it can just be carried up on the back of the work.
Yarn round hook with new COL B and pull through to complete the last dc (US sc). (Fig 6)

Fig 7: Join with a slip stitch in BLO of beginning dc.
Now work the join as you have for Rnds 2 and 3, skipping over the slip stitch from the previous round and working a slip stitch into the BLO of the beginning dc (US sc) of Rnd 4. (Fig 7)
Working Rnd 5
Rnd 5: [3 dc, 2 dc in next st] 6 times, join. 30 sts - don't forget, it's sc if you're using US terms!

Fig 8: First dc of Rnd 5 worked through both loops of beginning dc
|

Fig 9: Identifying slip stitch from previous round.
|
Next, as you have been doing on previous rounds, work the first stitch of Rnd 5 into both loops of that same beginning dc (US sc) of Rnd 4. (Fig 8)
Work the rest of Rnd 5 - at the end of the round it's easy to identify the slip stitch from the previous round as it's the first, lower stitch in COL B. (Fig 9)
As you have done from Rnd 2 onwards, skip over the slip stitch from the previous round and join with a slip stitch in the BLO of the beginning dc (US sc) of Rnd 5.
Working Rnd 6 onwards
Rnd 6: [4 dc, 2 dc in next st] 6 times, join. 36 sts - don't forget, it's sc if you're using US terms!
Change to COL A.
Change to COL A.

Fig 10: Pick up COL A again to work the last yrh of Rnd 6.
Work the first stitch of Rnd 6 into both loops of that same beginning dc (US sc) of Rnd 5 and then work the rest of Rnd 6 up to just before the last yrh (US yoh) of the last stitch. You are now changing colour again, so let go of COL B and pick up COL A from the back of the work (Fig 10), wrapping it round the hook and pulling it through to complete the stitch.
As you have done from Rnd 2 onwards, skip over the slip stitch from the previous round and join with a slip stitch in the BLO of the beginning dc (US sc) of Rnd 6.
As you have done from Rnd 2 onwards, skip over the slip stitch from the previous round and join with a slip stitch in the BLO of the beginning dc (US sc) of Rnd 6.
Rnd 7: [5 dc, 2 dc in next st] 6 times, join. 42 sts - don't forget, it's sc for Rnds 7-10 if you're using US terms!
Rnd 8: [6 dc, 2 dc in next st] 6 times, join. 48 sts
Change to COL B.
Rnd 9: [7 dc, 2 dc in next st] 6 times, join. 54 sts
Rnd 10: [8 dc, 2 dc in next st] 6 times, join. 60 sts
Rnd 8: [6 dc, 2 dc in next st] 6 times, join. 48 sts
Change to COL B.
Rnd 9: [7 dc, 2 dc in next st] 6 times, join. 54 sts
Rnd 10: [8 dc, 2 dc in next st] 6 times, join. 60 sts
Continue on, working the remaining four rounds in the same way, changing colour every two rounds, skipping over the slip stitch from the previous round and joining into the BLO of the beginning dc (US sc) of the round, then working the first stitch of the next round into both loops of the same beginning dc.

Fig 11: The seam
|

Fig 12: The unsightly "jog" between colours when working without joining
|
You'll end up with a flat circle like my one in the photos. You may be able to see a slight seam (Fig 11), it's unavoidable with joined rounds - how noticeable it is depends on the yarn you're using, but the colour changes themselves should be clean and the overall effect should be far more pleasing visually than if you were to make the same piece as a continuous spiral with a "jog" or "step" between the colours (Fig 12).

Fig 13: The back of the piece
If you turn the piece over and look at the back you can see where the different coloured yarns are carried behind (Fig 13) - this is fine for most amigurumi pieces as they are 3D shapes where you can't see the back of the work as it's inside the piece.
If you are making a piece where the back will be visible you will need attach the yarn by tying it onto the working yarn as you did for the first colour change in this tutorial and then cut the first yarn - making sure the yarn tails on both colours are long enough to weave in so the front and back both have a clean finish.
If you are making a piece where the back will be visible you will need attach the yarn by tying it onto the working yarn as you did for the first colour change in this tutorial and then cut the first yarn - making sure the yarn tails on both colours are long enough to weave in so the front and back both have a clean finish.
Using this technique for a single colour change on a continuous spiral pattern
I wouldn't use all joined rounds for a piece where there was just one colour change (for instance between a hoof and leg) as generally then the single jog is actually less noticeable than a seam would be running up all the rounds of a single colour section.
What you can do on a piece worked in continuous rounds where there's only one colour change, is to start as normal with continuous rounds then change to joining two rounds before you need to change colour, carry on joining for two rounds after and then go back to continuous rounds - that way you'll get a smooth colour change without a seam running up the whole piece.
And finally…
Most of my free patterns are written using the conventional continuous spiral amigurumi method, without joining - just to make them as user friendly as possible to less experienced crocheters just getting to grips with Amigurumi - and so there are 'jogs" between colours.
You can use the joined method on most conventional Ami patterns to give you invisible colour changes - see the info in the box above.
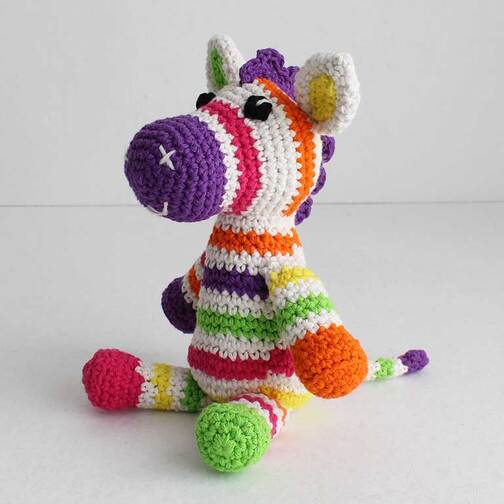
I would experiment with it for something where there were several colour changes - why not try it on my Zebra pattern and see the difference it makes to your finished piece!
Or check out the Red Panda pattern - the Tail part of the pattern is written in joined rounds to give his tail lovely smooth stripes!
Most of my free patterns are written using the conventional continuous spiral amigurumi method, without joining - just to make them as user friendly as possible to less experienced crocheters just getting to grips with Amigurumi - and so there are 'jogs" between colours.
You can use the joined method on most conventional Ami patterns to give you invisible colour changes - see the info in the box above.
I would experiment with it for something where there were several colour changes - why not try it on my Zebra pattern and see the difference it makes to your finished piece!
Or check out the Red Panda pattern - the Tail part of the pattern is written in joined rounds to give his tail lovely smooth stripes!