mycrochetchums
  • home
  • Free Patterns
  • Hints & Tips
    • Christmas Wreath Hints & Tips >
      • Joining Head & Neck
      • Embroidering Twinkles
      • Crocheting a 5 Point Star
      • Crochet leaf Photo Tutorial
      • Joining Reindeer Antler Tops
      • Christmas Wreath - How to crochet Elf's Pointed Collar
      • Christmas Wreath - Crocheting Santa's Hair
    • Embroidering an Amigurumi Smile
    • Sewing together seamlessly tutorial
    • Hiding Yarn Tails Photo Tutorial
    • Resizing an Amigurumi Pattern
    • Assembling Amigurumi Using Pin Lines
    • Perfect Stripes Photo Tutorial
    • Scrap Yarn Stitch Marker Photo Tutorial
    • Checking Tension/Gauge
    • UK Abbreviations
    • US Abbreviations
    • UK/US Crochet Terms
    • Oval Start Photo Tutorial
    • Magic Ring Photo Tutorial
    • Amigurumi Toes Photo Tutorial
    • Ami Claws Photo Tutorial
  • PDFs for Mailing Listers
  • About
  • Contact Me

Crochet Christmas Wreath - How to Crochet a Little Star 
for the Polar Bear and Penguin's Hats

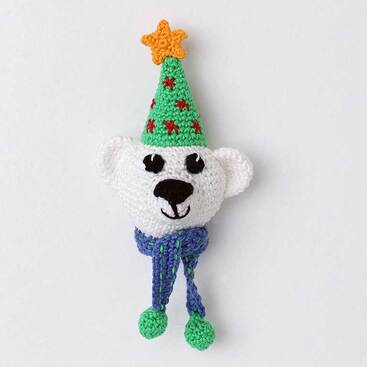
Picture of Polar Bear with Star on top of Hat
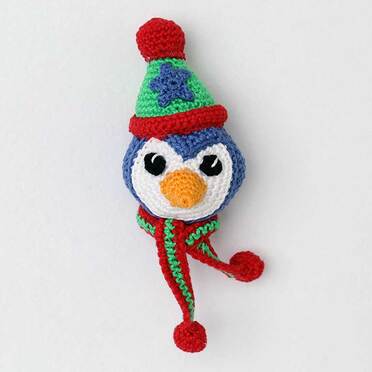
Picture of Penguin with Star on front of bobble Hat
These stars make great little finishing touches for the Polar Bear and Penguin. They're straightforward to make, but , if you're new to making amigurumi and reading patterns, the instructions might seem a little bewildering, so I thought a walk through with photos might help.
The pattern reads as follows:
UK and US crochet terms are NOT the same - this is written in UK terms but I've included the US terms in brackets.
​

Chains not included in the stitch count.

Rnd 1: With Appropriate Colour and working into a magic ring, 5 UK dc (US sc). 5 sts
Rnd 2: [3 ch, starting in second ch from hook, 1 sl st, 1 UK dc (US sc), 1 sl st in next st] 5 times, finish with sl st in last UK dc (US sc)of Rnd 1. 16 sts

Fasten off. Leave a long yarn tail to sew the Star to the Hat once you've made all the parts.


Let's break that down...
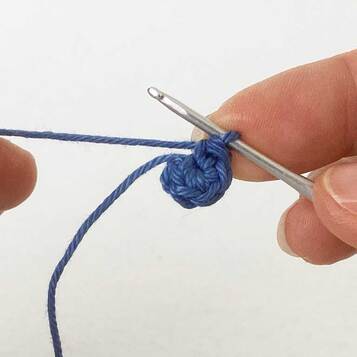
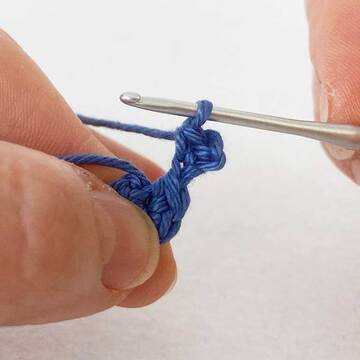
Picture of Fig 1 - crocheting star
Fig 1
For Rnd 1 you crochet 5 UK dc (US sc) into a magic ring - at the end of Rnd 1 your work will look like Fig 1.
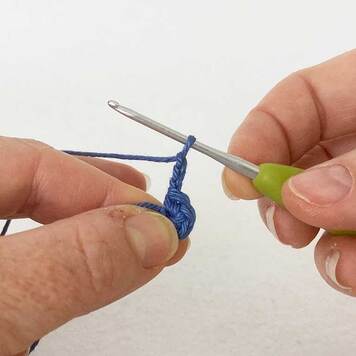
Picture of Fig 2 - crocheting star
Fig 2
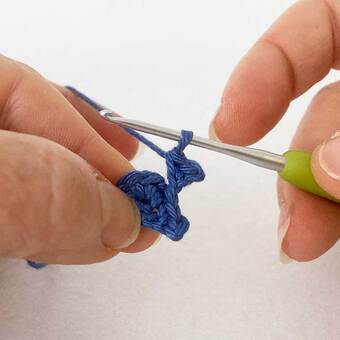
To start Rnd 2,  you need to  work 3 chains - as shown in Fig 2. 
Picture of Fig 3 crochet star
Fig 3
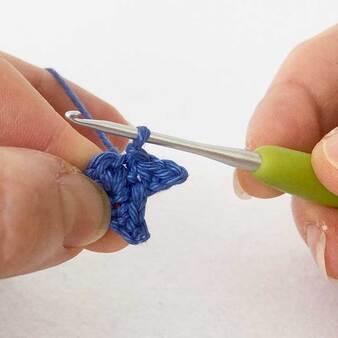
Now, starting in the second chain from the hook, work 1 slip stitch and 1 UK dc (US sc) - Fig 3.
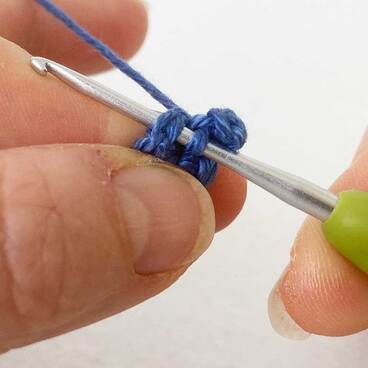
Picture of Fig 4 crochet star
Fig 4
Now work 1 slip stitch into the next stitch from the previous round - Fig 4.
Picture of Fig 5 crochet star
Fig 5
You've now completed the instructions in the brackets in Rnd 2 once and you've created the first point of the star - Fig 5.
Picture of Fig 6 crochet star
Fig 6
You now need to work the bracketed instructions all over again to create the next point, so work 3 chains - Fig 6.
Picture of Fig 7 crochet star
Fig 7
Once again, starting in second chain from the hook, work 1 slip stitch and then 1 UK dc (US sc) - Fig 7.
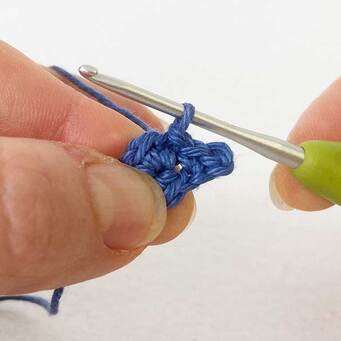
Picture of Fig 8 crochet star
Fig 8
Then work 1 slip stitch in the next stitch from the previous round - you've now completed the second point of the star. - Fig 8.
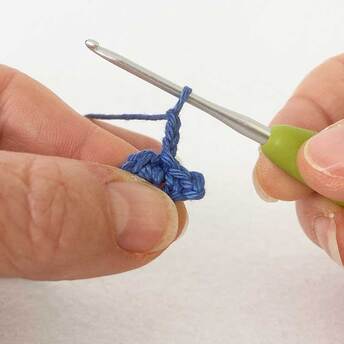
Picture of Fig 9 crochet star
Fig 9
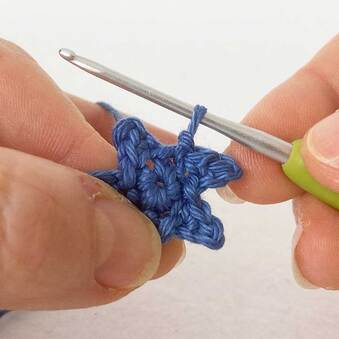
You work the bracketed instruction for Rnd 2, three more times - creating the 5 points of the star - and finish with a slip stitch into the last UK dc (US sc) of the previous round - Fig 9.
Picture of Fig 10 crochet star
Fig 10
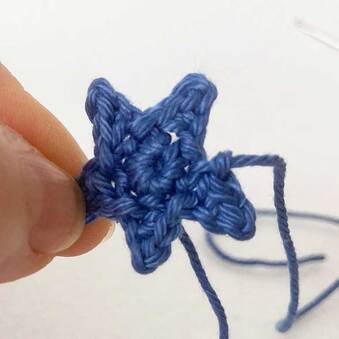
You now have a star! Fig 10.  Don't worry if it looks a bit wonky at this stage and the points look a bit rounded - you can pull it into shape as you stitch it in place on the Penguin's Hat or as you sew two stars together for the top of the Polar Bear's Hat.
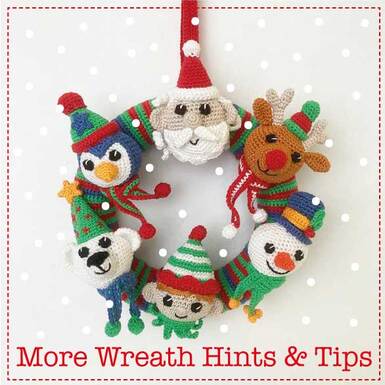
Picture for more hints and tips for crochet wreath
More Wreath Tips
Powered by Create your own unique website with customizable templates.
  • home
  • Free Patterns
  • Hints & Tips
    • Christmas Wreath Hints & Tips >
      • Joining Head & Neck
      • Embroidering Twinkles
      • Crocheting a 5 Point Star
      • Crochet leaf Photo Tutorial
      • Joining Reindeer Antler Tops
      • Christmas Wreath - How to crochet Elf's Pointed Collar
      • Christmas Wreath - Crocheting Santa's Hair
    • Embroidering an Amigurumi Smile
    • Sewing together seamlessly tutorial
    • Hiding Yarn Tails Photo Tutorial
    • Resizing an Amigurumi Pattern
    • Assembling Amigurumi Using Pin Lines
    • Perfect Stripes Photo Tutorial
    • Scrap Yarn Stitch Marker Photo Tutorial
    • Checking Tension/Gauge
    • UK Abbreviations
    • US Abbreviations
    • UK/US Crochet Terms
    • Oval Start Photo Tutorial
    • Magic Ring Photo Tutorial
    • Amigurumi Toes Photo Tutorial
    • Ami Claws Photo Tutorial
  • PDFs for Mailing Listers
  • About
  • Contact Me