How to Add a Smile on your Amigurumi
A guide to Embroidering a Mouth
With Amigurumi, it's often those last little details that bring the character to life and it's something crocheters often find challenging.
One of my lovely Mailing Listers (you can join the Chums Gang HERE) emailed to ask for tips on creating facial features on Amigurumi so I'm going to show you an easy, simple way to add a smile to your Amigurumi Crochet.
It's so tempting, when you've made all the body parts to dive straight in and try to get all the sewing up and finishing touches done in a rush - often late in the evening, when you're tired and want to get to bed …trust me, at that time of night it won't go well.
My top tip, before you even think about embroidering a mouth on an Amigurumi is, pick your moment. Wait until the morning, when you're rested and fresh, with good daylight to work in…it'll go so much better.
For this tutorial you will need:
- Pins - the kind with the ball shaped glass or plastic heads, so that they don't disappear into your crochet never to be seen again.
- Scissors.
- Yarn Needle.
- Contrasting yarn for the mouth. A dark colour generally works best - mostly I use black as I like my characters to have black eyes but a dark brown, navy or grey works well too.
Ready to find out what to do?
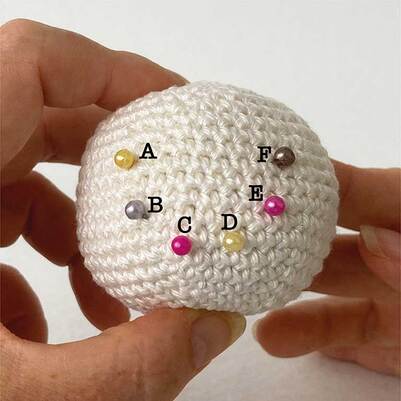
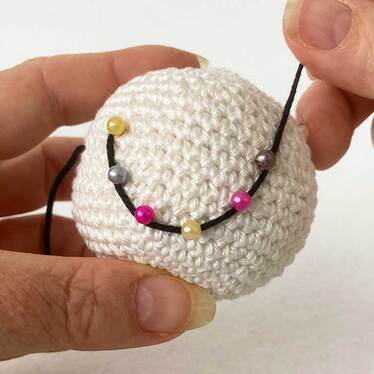
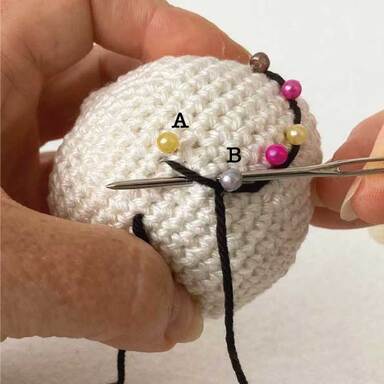
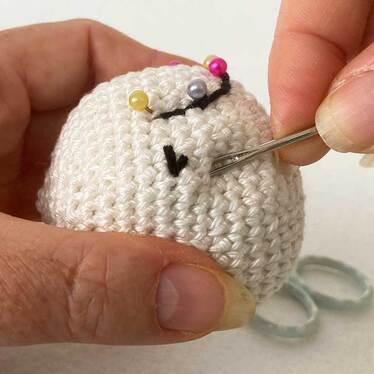
The first step is to mark out the shape of your characters' mouth using pins (Fig 1). Take the time at this stage to create a nice even curved shape. Have a look at it from all angles and if you have other facial features (or ears) already in place, check that the position looks right in relation to these.
Try to get the pins evenly spaced - you're going to be using them as a guide to where you'll make the stitches that will secure the mouth in place.
I've marked my pin positions with the letters A to F to help you follow the tutorial (Fig 1). You'll be putting the needle in and bringing it out exactly where the pins are inserted.
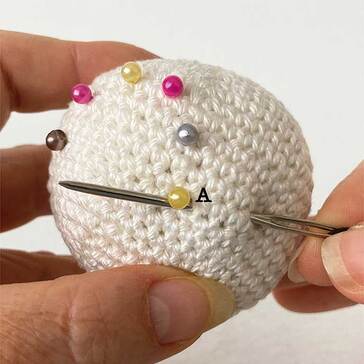
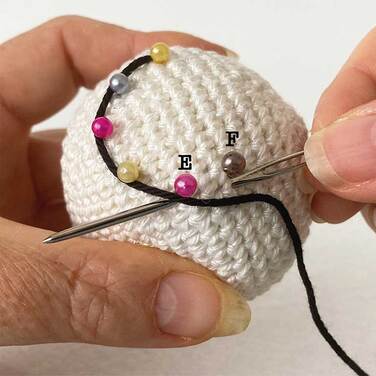
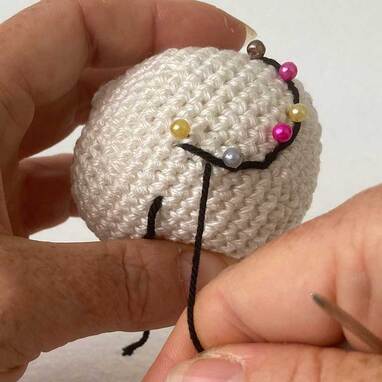
With the yarn colour you've chosen for your Amigurumi smile, insert the needle away from the pin line but near to one end of it (Fig 2). Bring the yarn needle out again through the place where the first pin - Point A - is inserted (Fig 3). Pull the working yarn through at Point A, leaving a yarn tail of a few cm at the insertion point- you'll need this later.
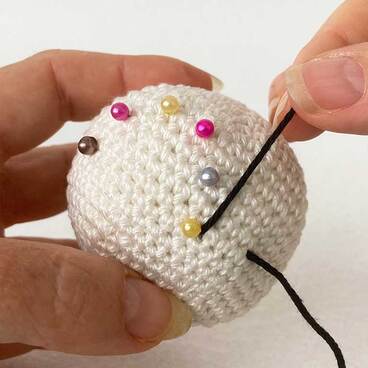
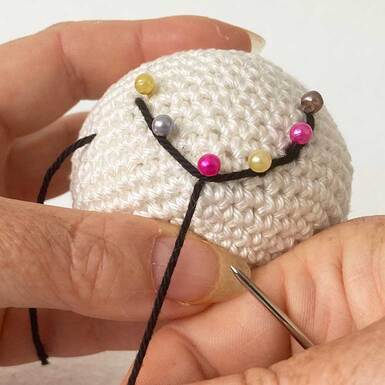
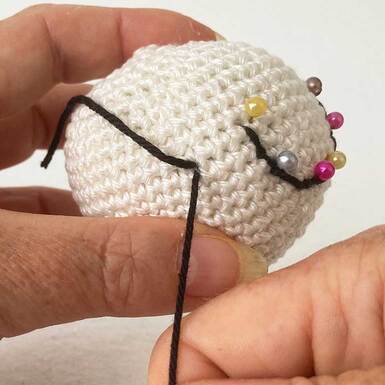
Now drape the working yarn along the line of pins so that is sitting just below them when you're holding the head with the smile the right way up (Fig 4).
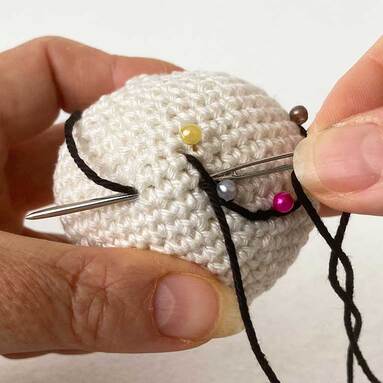
The draped yarn makes the smile shape and next you'll be creating a series of securing stitches over the draped yarn at the points where you've inserted the pins. Insert the needle into the Head at the end of the smile - Point F - in the same place as the last pin is inserted and bring it out again under the draped piece of yarn in the same place as the next pin along - Point E. It's important that it comes out underneath the draped yarn, not over the top of it (Fig 5).
The draped yarn makes the smile shape and next you'll be creating a series of securing stitches over the draped yarn at the points where you've inserted the pins. Insert the needle into the Head at the end of the smile - Point F - in the same place as the last pin is inserted and bring it out again under the draped piece of yarn in the same place as the next pin along - Point E. It's important that it comes out underneath the draped yarn, not over the top of it (Fig 5).
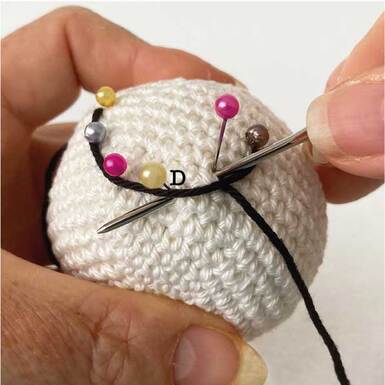
In Fig 6 above, I've lifted the pin at point E up slightly so you can see the next step easier. You need to insert the needle back into the same place you've just brought it out but this time, on the other side of the draped part of the yarn. Bring it out again where the next pin along is inserted into the work , making sure it comes out below the draped yarn- Point D in Fig 6.
Pull the yarn taught so that the stitch you made by point E tightens up over the top of the draped yarn securing it in position (Fig 7).
Pull the yarn taught so that the stitch you made by point E tightens up over the top of the draped yarn securing it in position (Fig 7).
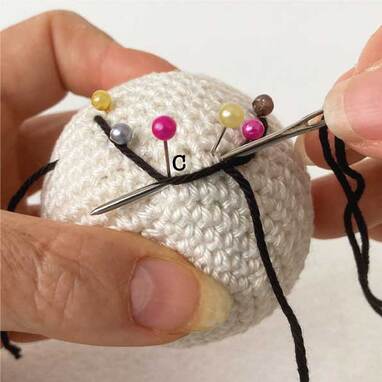
As before, reinsert the needle in the same spot at point D but from the other side of the draped yarn and bring it out again below the draped yarn, where the next pin along is inserted - point C in Fig 8.
Pull the yarn taught so that the stitch you made by point D tightens up over the top of the draped yarn, securing it in position (Fig 9).
Pull the yarn taught so that the stitch you made by point D tightens up over the top of the draped yarn, securing it in position (Fig 9).
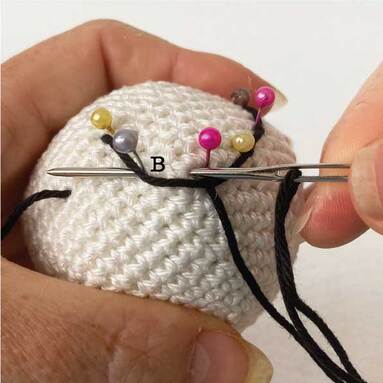
Repeat the process again, reinserting the needle in the same spot at point C from the other side of the draped yarn and bring it out again below the draped yarn at the next pin along - Point B (Fig 10).
Pull the yarn taught so that the stitch you made by point C tightens up over the top of the draped yarn, securing it in position (Fig 11).
Pull the yarn taught so that the stitch you made by point C tightens up over the top of the draped yarn, securing it in position (Fig 11).
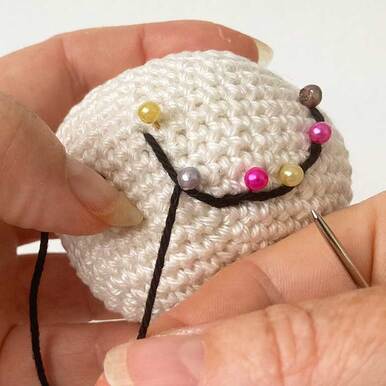
Work your way along the smile making the securing stitch over the draped yarn at each point where there's a pin. As I was making my smile, I realised that I'd left a bit of a big gap between points A & B so I added in an extra securing stitch between the two to make sure the smile kept its nice curve all the way along (Figs 12 & 13).
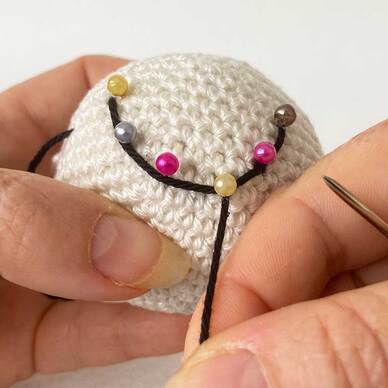
When you make the last of your securing stitches, insert the needle above the draped yarn to finish that stitch and then bring it out again in EXACTLY the same place as you inserted the yarn at the beginning (Figs 14 & 15).
Both the starting tail and the working yarn must be coming out of the piece in the same hole - the next stage will not work if they're not.
Both the starting tail and the working yarn must be coming out of the piece in the same hole - the next stage will not work if they're not.
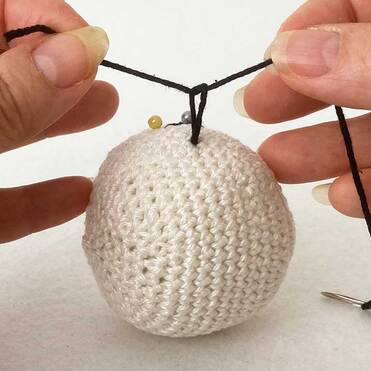
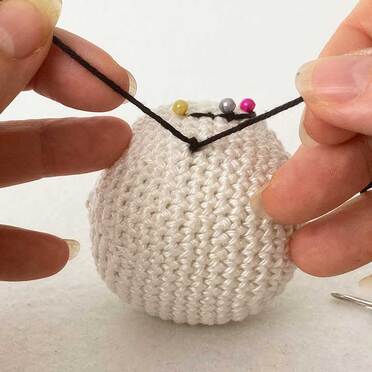
Knot the starting tail and working yarn together (Fig 16), pulling the knot tight so that it sits snuggly against the main amigurumi piece (Fig 17).
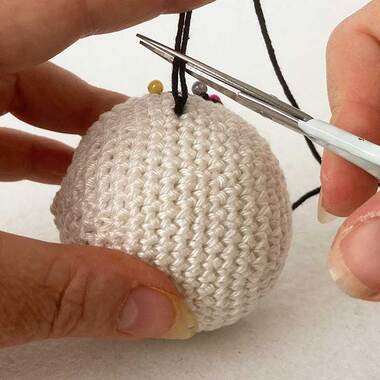
Cut the excess yarn tails off about 1 cm away from the knot (Fig 18).
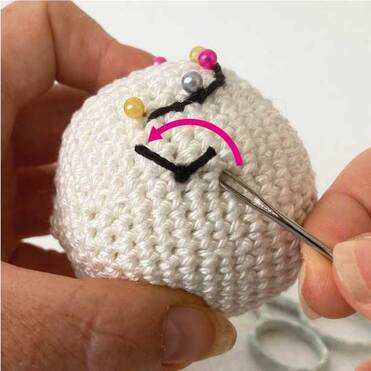
Next, insert the wrong end of a yarn needle into the main amigurumi piece to one side of the knot and swivel it (Fig 19) so that it catches the yarn that runs to the knot on the inside of the piece- this will start to pull the knot inside the piece (Fig 20). Keep wiggling the end of the needle around inside the piece until the knot and yarn ends have completely disappeared inside the work.
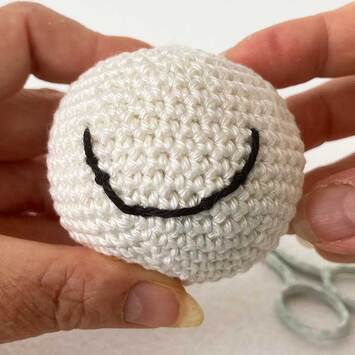
Finally, remove the pins to reveal the finished smile (Fig 21). All done!
Want to practice this technique? Try it out on one of the free patterns below...
More Photo Tutorials to help you make great Amigurumi...

