Crochet Christmas Wreath
How to make the Leaves for the Snowman's Hat
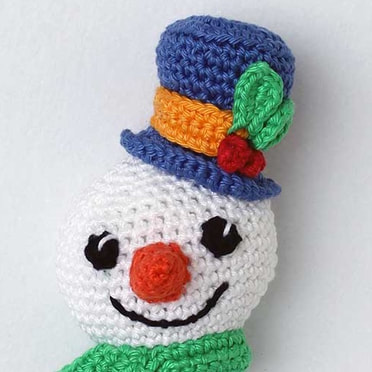
This is another nice little finishing touch. As not everyone may be familiar with crocheting up one side of a chain and down the other, I thought a quick photo tutorial might be helpful
The pattern reads as follows:
UK and US crochet terms are NOT the same - this is written in UK terms. If you're used to working in US crochet terms - substitute "sc" for "dc", and "hdc" for "htr" in the pattern below.
Leaves- make 2
The chains are not included in the stitch count.
With COL D, chain 6.
Rnd 1: *Starting in second chain from hook, 1 sl st, 1 dc, [2 htr] in next st, 1 dc, 1 sl st**, 1 ch; rotating as you go, rep from * to ** once more down the other side of the chain. 12 sts
Fasten off. Leave a long yarn tail to sew the Leaf to the Hat once you've made all the parts.
Let's break that down...
|
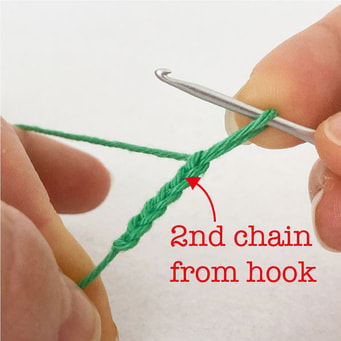
The first thing you need to do is work 6 chains. You're going to be working. back down the chain, starting in the second chain from the hook- Fig 1.
|
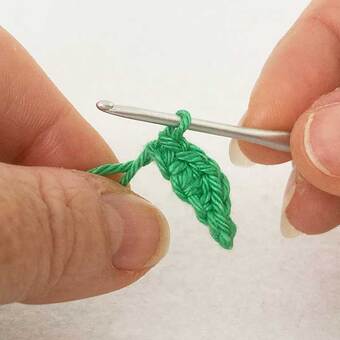
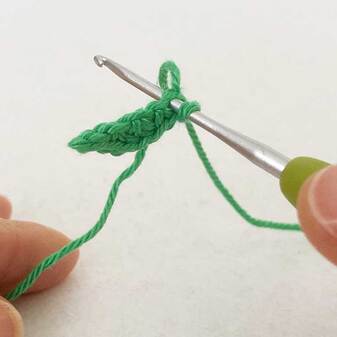
Work 1 slip stitch in the second chain from the hook, then carry on working down the chain, with 1 UK dc (US sc) in the next stitch, 2 UK htr (US hdc) in the next stitch, another UK dc (US sc) in the next and another slip stitch in the final stitch of the chain. When you're done, it should look like mine above - Fig 2.
|
|
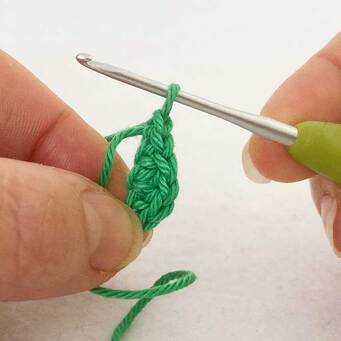
You've now worked the Rnd 1 instructions in the pattern from * to ** once. Next you need to work 1 chain - Fig 3 - this helps you turn at the end of the leaf and stops it from curling up when you rotate it to work down the other side of the chain.
|
"Rotating as you go" in the pattern just tells you that you're twisting the work round a bit to work in the other side of the chain. You're going to repeat the instructions from * to **, starting in the first stitch in the back of the chain - it's the one I've got the hook through in Fig 4.
|
|
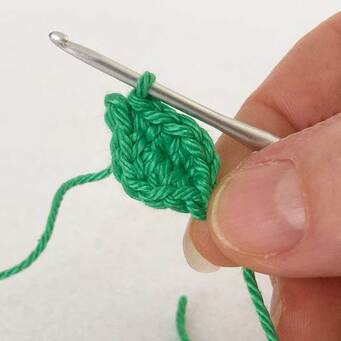
So, once again, working down the back of the chain, work 1 slip stitch in the stitch shown in Fig 4, 1 UK dc in the next one along the chain, (US sc), 2 UK htr (US hdc) into the next stitch, another UK dc (US sc) in the next and a final slip stitch in the last chain - Fig 5.
|
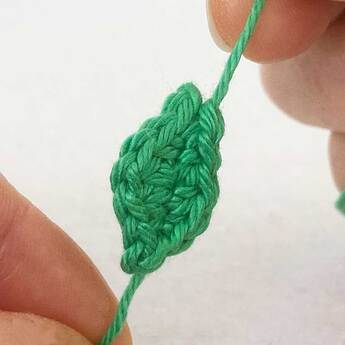
You now have your leaf! I made use of both the starting and finishing yarn tails to sew it to the Snowman's hat - securing it at both ends ensures it stays both in the position you want and nice and flat.
|

