
How to position Amigurumi Body Parts
Photo Tutorial for Using Pin Line Guides when Assembling Amigurumi

Not sure where to begin? I've got you!
How you put together all the crocheted parts of an Amigurumi makes a HUGE difference to how the finished item looks. It's well worth paying attention to detail at this point and taking time to make sure all the pieces are positioned correctly and sitting symmetrically - your secret friends that will help you achieve this easily are…lots of PINS!
I devised this technique after learning the hard way that it's not easy to get limbs etc in position symmetrically just by eye. Fed up with unpicking and reattaching I decided I needed a simple system to visually represent the central line of the biggest parts. This method works well on any size of amigurumi and saves much frustration!
I devised this technique after learning the hard way that it's not easy to get limbs etc in position symmetrically just by eye. Fed up with unpicking and reattaching I decided I needed a simple system to visually represent the central line of the biggest parts. This method works well on any size of amigurumi and saves much frustration!
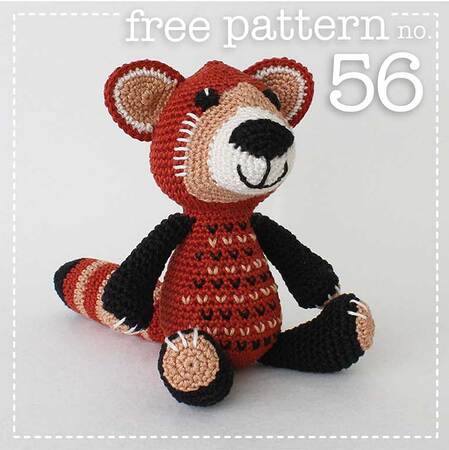
Try the technique on my Red Panda pattern!
In this tutorial I'll walk you through using pin lines to help you assemble the main parts of my Red Panda pattern - if you'd like to make him, you can find him HERE.
I'm not covering the best sewing techniques to use here- Tutorials coming soon on that! - the first step to making your Amigurumi look great is to get all the pieces positioned in the right places.
I'm not covering the best sewing techniques to use here- Tutorials coming soon on that! - the first step to making your Amigurumi look great is to get all the pieces positioned in the right places.

Arm yourself with round head pins - lots of them!
You'll need to use the kind of dressmaking pins that have a plastic or glass round ball head on the top so that you can see them easily and they don't disappear into the crochet never to be seen again!
Before we actually attempt to position anything, we're going to make our lives easier by inserting lines of pins to mark the central lines on the Body and Head. Let's start with the Body.

Fig 1 - deciding the back/front of the Body
Hold the Body with the fastening off point of the last round towards you - we're using this to indicate the centre of the back of the neck. (Fig 1)

Fig 2 - pin line down centre back
|

Fig 3 - continuing pin line through centre of base
|
Insert a row of pins from the fastening off point vertically down the back of the Body - this is the first part of your central pin line. (Fig 2)
Carry the row of pins under the base and through the central starting point of the Body. (Fig 3)
Carry the row of pins under the base and through the central starting point of the Body. (Fig 3)

Fig 4 - continuing pin line up centre front of the Body
Turn the front of the Body towards you and add more pins to extend the central line up the front towards the neck. (Fig 4)

Fig 5 - marking the centre line of the Head
Next, do the same to the Head, inserting a central pin line down the front, underneath its base and up the centre of the back of the Head. (Fig 5)

Fig 6 - pinning Head and Body together
Now you can use the two pin lines as a guide to join the Head and Body together symmetrically. Line the two lines of pins up and use extra pins to secure the Body to the Head. (Fig 6)
Sew the two together.
Sew the two together.
DON'T remove the pin lines from the Head and Body - they still have work to do!

Fig 7 - pinning the Muzzle in place
The next piece to position is the Red Panda's Muzzle. The shape of the muzzle is basically a triangle with rounded corners so make sure one corner lines up with top of the pin line running down the front of the Head. Remove the pins on the front of the Head that would be trapped under the Muzzle piece. Use the pin line on the front of the body as a guide, to make sure the bottom side of the triangular muzzle shape sits evenly in relation to it. (Fig 7)

Fig 8 - pin line added down centre of Muzzle
With the Muzzle stitched in place, add a line of pins running down that too. This acts as a guide for positioning the Eyes evenly and will also help when you put the Ears in place later. (Fig 8)

Fig 9 - positioning the Arms
The centre lines on the Muzzle and Body are now helpful for positioning the Arms. Counting the stitches on either side of the central line between it and the front edge of the Arm join helps to establish that the Arms are evenly placed. (Fig 9)
It's also worth checking the placement of the Arms in relation to the centre line on the back of the body too before you stitch them into position.
It's also worth checking the placement of the Arms in relation to the centre line on the back of the body too before you stitch them into position.

Fig 10 - positioning the Ears
|

Fig 11 - check Ears are even in relation to back of Head
|
The next step is to attach the Ears - again checking their position in relation to both the centre line down the muzzle (Fig 10) and the one down the back of the Head (Fig 11).

Fig 12 - check the Ear position in relation to the Muzzle edge
You can also make other comparisons to check the position - for instance, by looking at the Head side on and making sure the number of stitches on the Head along a round between the bottom corner of the ear and the edge of the Muzzle are the same on both sides. (Fig 12)

Fig 13 - Position Legs evenly on base, set forwards
|

Fig 14 - check Leg position in relation to centre pin line on Body
|
The pin line running under the base of the Body will help you position the Legs evenly. Set the legs forward on the base of the Body so that the Red Panda will be able to sit on his bottom. (Fig 13)
Make sure the Legs are located evenly in relation to the pin line down the front of the Body too before you stitch them into place. (Fig 14)
Make sure the Legs are located evenly in relation to the pin line down the front of the Body too before you stitch them into place. (Fig 14)

Fig 15 - position Tail on back pin line
|

Fig 16 - Tail positioned on pin line under Body base
|
Use the pin line down the back (Fig 15) and round the base of the Body (Fig 16) to help you position the Tail centrally.

Fig 17 - positioning the Nose
Use the pin line down the centre of the Muzzle to help you position the Nose. (Fig 17)

Fig 18 - the main body parts joined together
You now have all the main parts of the Red Panda assembled. Not every element needs a pin line - the paw pads for example, can just be attached by eye.
Finally, my Top Tip for a great finish:
Don't start assembling your Amigurumi late at night, the moment you've finished hooking up the very last piece, rushing it is just asking for mistakes, unpicking and tears of frustration... save it for the morning when you're fresh - it will go MUCH better!
Don't start assembling your Amigurumi late at night, the moment you've finished hooking up the very last piece, rushing it is just asking for mistakes, unpicking and tears of frustration... save it for the morning when you're fresh - it will go MUCH better!


