mycrochetchums
  • home
  • Free Patterns
  • Hints & Tips
    • Christmas Wreath Hints & Tips >
      • Joining Head & Neck
      • Embroidering Twinkles
      • Crocheting a 5 Point Star
      • Crochet leaf Photo Tutorial
      • Joining Reindeer Antler Tops
      • Christmas Wreath - How to crochet Elf's Pointed Collar
      • Christmas Wreath - Crocheting Santa's Hair
    • Embroidering an Amigurumi Smile
    • Sewing together seamlessly tutorial
    • Hiding Yarn Tails Photo Tutorial
    • Resizing an Amigurumi Pattern
    • Assembling Amigurumi Using Pin Lines
    • Perfect Stripes Photo Tutorial
    • Scrap Yarn Stitch Marker Photo Tutorial
    • Checking Tension/Gauge
    • UK Abbreviations
    • US Abbreviations
    • UK/US Crochet Terms
    • Oval Start Photo Tutorial
    • Magic Ring Photo Tutorial
    • Amigurumi Toes Photo Tutorial
    • Ami Claws Photo Tutorial
  • PDFs for Mailing Listers
  • About
  • Contact Me

Crochet Christmas Wreath - Hints & Tips
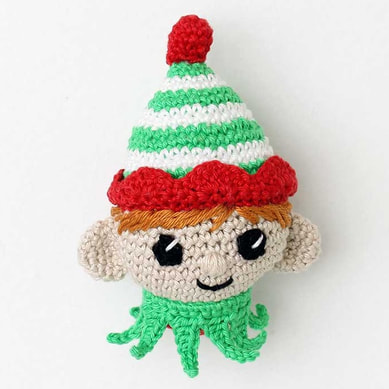
​How to make the Elf's Collar

Picture of Crochet elf
A Step by Step Photo Tutorial for the Elf's Collar - in case you've never made anything like it before!
Here's a recap of the Collar Pattern...
​With COL D, chain 29. 
Row 1: Starting in second ch from hook, 28 dc. Turn. 
Row 2: 1 ch, *1 sl st, 8ch, starting in second ch from hook, 2 sl st, 2 dc, 2 htr, 1 tr, miss next 2 sts; rep from * 8 more times, finish with a sl st in the last dc of Row 1.
​
Fasten off. Leave a long yarn tail to sew the Collar to the Neck once you've made all the parts.
UK and US crochet terms are NOT the same - this is written in UK terms. If you're used to working in US crochet terms - substitute "sc" for "dc", and "hdc" for "htr" in the pattern above.
If you're looking for the full Elf Pattern, you can find it HERE.
Picture of Crochet Elf's Collar - Fig 1
Elf Collar - Fig 1
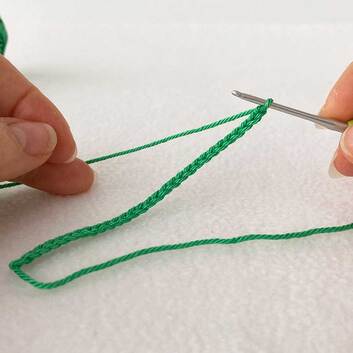
Firstly, you need to work 29 chains - Fig 1.
Picture of Crochet Elf's Collar - Fig 2
Elf Collar - Fig 2
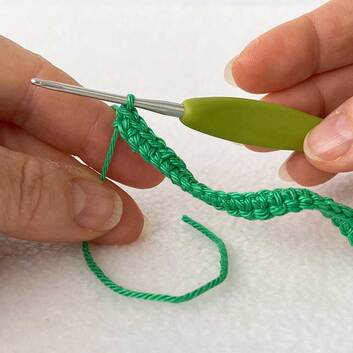
Turn and, for Row 1,  starting in the second chain from the hook, work 1 dc (US sc) in each stitch down the chain - at the end of the row you'll have 28 stitches - Fig 2.
Picture of Crochet Elf's Collar - Fig 3
Elf Collar - Fig 3
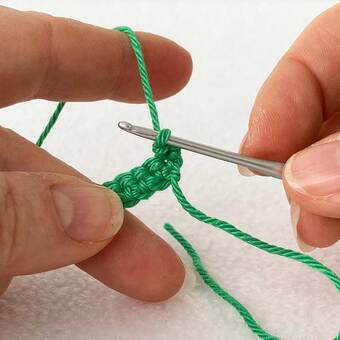
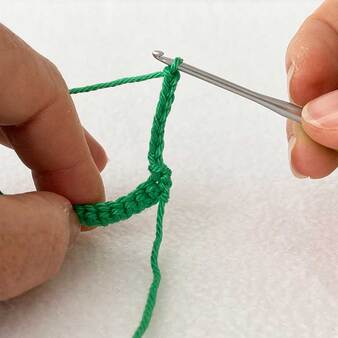
Turn the work so you can start on Row 2. Work 1 chain and then 1 slip stitch in the top of the last dc (US sc) of the previous row - Fig 3.
Picture of Crochet Elf's collar - Fig 4
Elf Collar - Fig 4
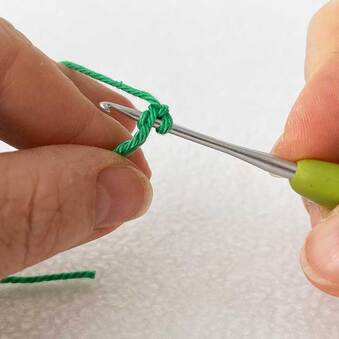
You're now going to start to make the first point of the Collar by working 8 chains - Fig 4.
Picture of Crochet Elf's Collar - Fig 5
Elf collar - Fig 5
You're going to work back down that chain, starting in the second chain from the hook - which is where my hook is inserted in Fig 5 above.
Picture of Crochet Elf's Collar - Fig 6
Elf Collar - Fig 6
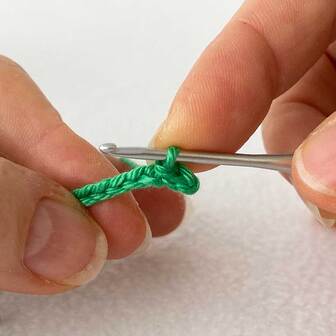
Work 1 sl st in each of the first 2 chains - Fig 6.
Picture of Crochet Elf's Collar - Fig 7
Elf Collar - Fig 7
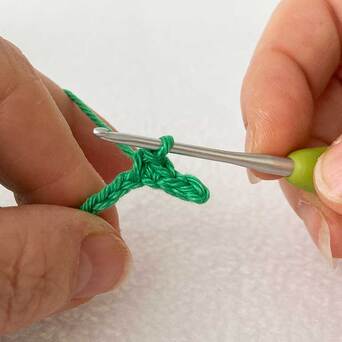
Next work 1 dc (US sc) in each of the next two chains - Fig 7 above.
Picture of Crochet Elf Collar - Fig 8
Elf Collar - Fig 8
Then work 1 htr (US hdc) in each of the next two chains - Fig 8.
Picture of Crochet Elf Collar - Fig 9
Elf Collar - Fig 9
Finish the point with 1 tr (US dc) in the last chain - as shown in Fig 9 above. 
Picture of Crochet Elf Collar - Fig 10
Elf Collar - Fig 10
You need to miss the next two stitches of Row 1. You've now worked the instructions from * to ** once and you're going to repeat them again to work the next point. In Fig 10 above, you can see the two stitches of Row 1 you need to miss, you'll be working into the stitch that the tip of my left thumb nail is pressing into.
Picture of Crochet Elf Collar - Fig 11
Elf Collar - Fig 11
You're now starting on the instructions from * to ** again - so work 1 slip stitch in the indicated stitch - Fig 11
Picture of Crochet Elf Collar - Fig 12
Elf Collar - Fig 12
Work another 8 chains - Fig 12
Picture of Crochet Elf Collar - Fig 13
Elf Collar - Fig 13
Working down the chain you've just made, once again work 2 sl st, 2 dc (US sc), 2 htr (US hdc) and 1 tr (US dc) to make the second point - Fig 13
Picture of Crochet Elf Collar - Fig 14
Elf Collar - Fig 14
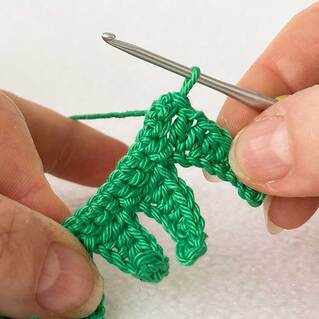
As before, you're going to miss the next two stitches of Row 1 and work into the third one - the one next to my left thumb nail in Fig 14 above.
Picture of Crochet Elf Collar - Fig 15
Elf Collar - Fig 15
Work a slip stitch into the indicated stitch to start the third point of the collar - Fig 15.
Picture of Crochet Elf Collar - Fig 16
Elf Collar - Fig 16
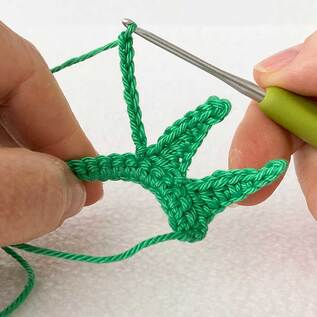
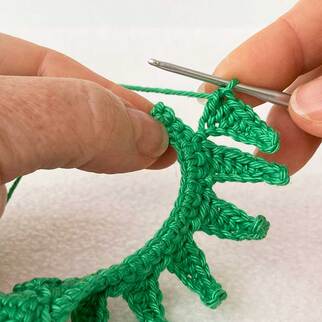
As before, you work a chain of 8 - Fig 16 - and then crochet back down the chain to create the third point. Carry on repeating the sequence, working all the way along Row 1.
Picture of Crochet Elf Collar - Fig 17
Elf Collar - Fig 17
Picture of Crochet Elf Collar - Fig 18
Elf Collar - Fig 18
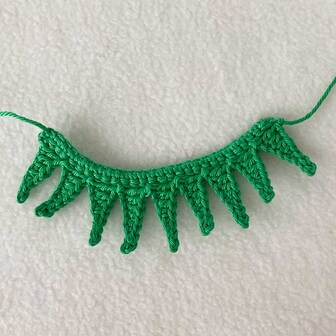
When you have completed the 9th point, miss the next two stitches and work 1 slip stitch into the last stitch of the previous row and fasten off - Figs 17-18.
Picture of Crochet Elf Collar - Fig 19
Elf Collar - Fig 19
All done!
Picture
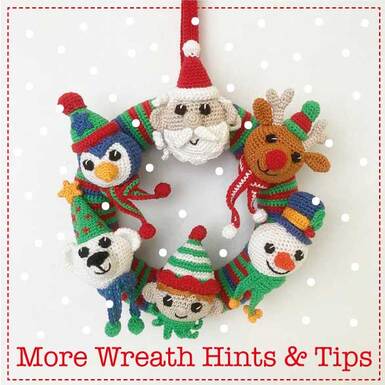
More Wreath Hints
Powered by Create your own unique website with customizable templates.
  • home
  • Free Patterns
  • Hints & Tips
    • Christmas Wreath Hints & Tips >
      • Joining Head & Neck
      • Embroidering Twinkles
      • Crocheting a 5 Point Star
      • Crochet leaf Photo Tutorial
      • Joining Reindeer Antler Tops
      • Christmas Wreath - How to crochet Elf's Pointed Collar
      • Christmas Wreath - Crocheting Santa's Hair
    • Embroidering an Amigurumi Smile
    • Sewing together seamlessly tutorial
    • Hiding Yarn Tails Photo Tutorial
    • Resizing an Amigurumi Pattern
    • Assembling Amigurumi Using Pin Lines
    • Perfect Stripes Photo Tutorial
    • Scrap Yarn Stitch Marker Photo Tutorial
    • Checking Tension/Gauge
    • UK Abbreviations
    • US Abbreviations
    • UK/US Crochet Terms
    • Oval Start Photo Tutorial
    • Magic Ring Photo Tutorial
    • Amigurumi Toes Photo Tutorial
    • Ami Claws Photo Tutorial
  • PDFs for Mailing Listers
  • About
  • Contact Me