Crochet Christmas Wreath - Hints & Tips
How to make the Santa's Hair
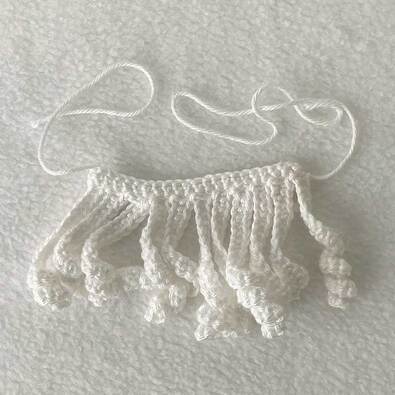
A quick walk through of how to make the Santa's hair, in case you've not made something like this before.
The hair is made in two layers - I'm going to talk you through making the bottom layer - the same techniques apply for the top layer too but with fewer stitches on the strands.
The hair is made in two layers - I'm going to talk you through making the bottom layer - the same techniques apply for the top layer too but with fewer stitches on the strands.
Here's a recap of the Bottom Layer Pattern...
With COL A, chain 23.
Row 1: Starting in second ch from hook, 22 dc. Turn. 22 sts
To work the curly strands of hair:
Row 2: *22ch, starting in second ch from hook, [2 dc in next st] 10 times, 11 dc, miss next st of Row 1, 1 sl st; rep from * 10 more times, finishing with a sl st in last dc of Row 1.
Fasten off. Leave a long yarn tail to sew the Hair to the Head once you've made all the parts.
UK and US crochet terms are NOT the same - this is written in UK terms. If you're used to working in US crochet terms - substitute "sc" for "dc" in the pattern above.
If you are looking for the full Santa Pattern, you can find that HERE.
|
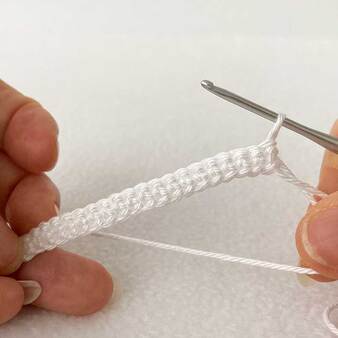
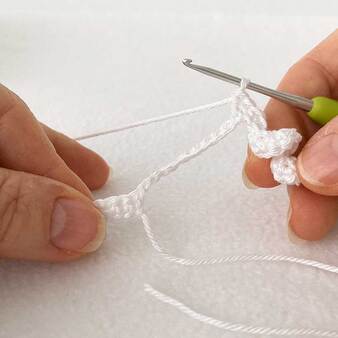
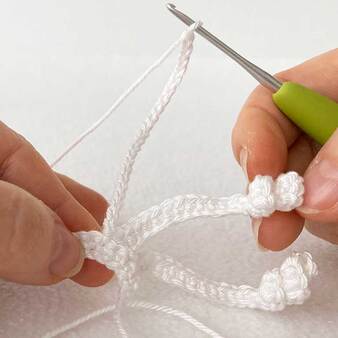
To start the Hair, you need to work 24 chains and then, starting in the second chain from the hook, work 1 dc (US sc) in each stitch back down the chain. You will have 23 stitches at the end of Row 1. Turn the work to start Rnd 2 - you'll be at the same point I am in Fig 1 above.
|
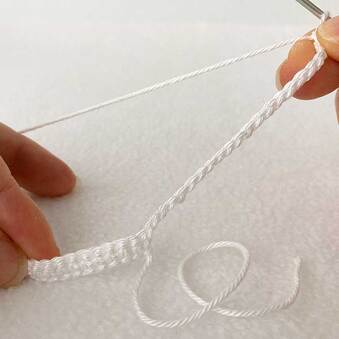
To start the first strand of hair, you need to work 22 chains - Fig 2.
|
|
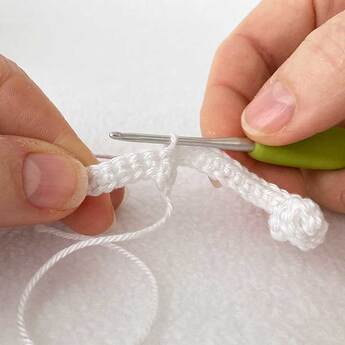
You then work back down this chain, again starting in the second stitch from the hook. You're going to work 2dc (US sc) each in the next 10 stitches down the chain - this makes the end of the hair strand curl round - Fig 3
|
Next, you're going to work 1 dc (UK sc) each in the next 11 stitches of the chain to create the straight part of the hair strand. In Fig 4 above, I have the first hair strand in my right hand and Row 1 in my left one.
|
|
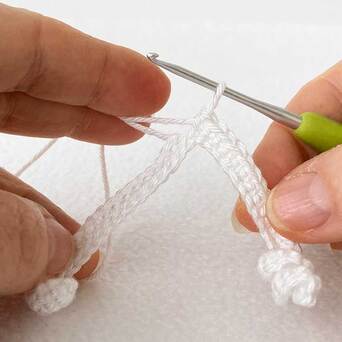
You're going to miss one stitch of Row 1 and work 1 slip stitch into the next one along - Fig 5.
|
You now need to work the whole sequence again, starting with another 22 chains, which you then crochet back down, working 2 dc (US sc) each in the first 10 stitches of the chain followed by 1 dc (US sc) in each of the next 11 stitches. This creates the second hair strand - Fig 6.
|
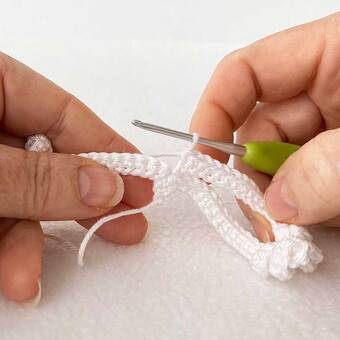
Once again, miss the next stitch of Row 1 and work 1 slip stitch into the next stitch along on that row, then work another 22 chains - as shown in Fig 7 above - to start the third hair strand.
You carry on working along Row 1 like this until you have 11 hair strands. Slip stitch in the last stitch of Row 1 and fasten off.
The Top Layer of Hair is made in the same way but the strands of hair are shorter.
You carry on working along Row 1 like this until you have 11 hair strands. Slip stitch in the last stitch of Row 1 and fasten off.
The Top Layer of Hair is made in the same way but the strands of hair are shorter.
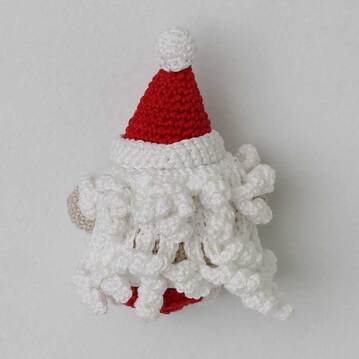
Attaching the bottom layer...
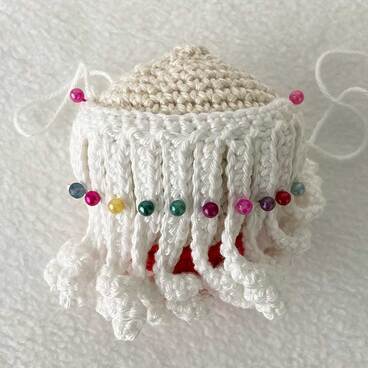
When you come to attach both layers of hair, you will already have sewn the Santa hat in place - the above image is just to show you how to pin the bottom layer of hair in place to cover the back of Santa's head. Sew the top edge (between the two pink pins above) up against the bottom edge of Santa's hat. Then sew down the edges of the strands to the point where my row of pins is. so the back of the head is covered but the bottom of the hair strands is still loose.
You only need to sew the top edge of the top layer of hair up against the bottom of the Santa hat - the length of each of the top layer hair strands can stay loose.
You only need to sew the top edge of the top layer of hair up against the bottom of the Santa hat - the length of each of the top layer hair strands can stay loose.

