
Amigurumi Claws Photo Tutorial

Amigurumi Claws
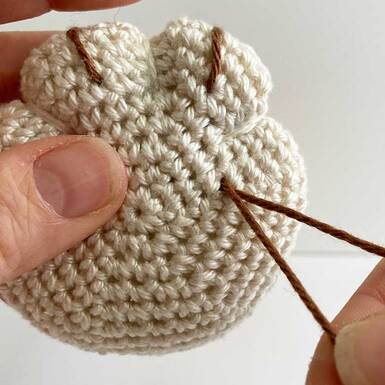
The finishing touches are what will make your Amigurumi Crochet look fabulous. Little details make all the difference. In this photo tutorial I’ll be taking you through a really simple method for embroidering claws on your crochet toys.
This example shows a creature with three toes and claws per foot - the method can be easily adapted for a creature with more toes/claws on each foot.
If you’d like to know how to make the toe shapes like in the picture above, it’s best to do them first and then add the claws, so check out my Amigurumi Toes Photo tutorial HERE.
Let's get started!

Ami Claws - Fig 1
|

Ami Claws - Fig 2
|
The letters in Figs 1 & 2 above are used throughout the instructions to indicate entry and exit points for the needle. You may find it helpful to place pins to mark the points before you begin.

Ami Claws - Fig 3
|

Ami Claws - Fig 4
|
Step 1: Using a length of contrasting yarn and a yarn needle, with the underside of the foot towards you insert the needle to the right of the right hand toe and bring it out at point A - pull the yarn through and leave a 5cm approx yarn tail at the insertion point. (Fig 3)
Use the thumb of the hand not holding the needle to hold the yarn tail in position so it doesn’t pull through completely. Bring the working yarn up over the edge of the toe. (Fig 4)
Use the thumb of the hand not holding the needle to hold the yarn tail in position so it doesn’t pull through completely. Bring the working yarn up over the edge of the toe. (Fig 4)

Ami Claws - Fig 5
|

Ami Claws - Fig 6
|
Step 2: Insert the needle in the foot at point D and bring it out half way down the imaginary vertical line running between points A and D (Fig 5). Pull the yarn through so it tightens against the foot and makes the first claw.
Step 3: Take the working yarn over the yarn forming the claw and reinsert the needle in the same point that you brought it out of the foot from in Step 2 - this will secure the yarn forming the claw against the foot. Bring the needle out at point B on the underside of the middle toe. (Fig 6)
Step 3: Take the working yarn over the yarn forming the claw and reinsert the needle in the same point that you brought it out of the foot from in Step 2 - this will secure the yarn forming the claw against the foot. Bring the needle out at point B on the underside of the middle toe. (Fig 6)

Ami Claws - Fig 7
|

Ami Claws - Fig 8
|
Step 4: Pull the yarn through (Fig 7), insert the needle in the foot at point E and bring it out half way down the imaginary vertical line running between points B and E (Fig 8). Pull the yarn through so it tightens against the foot and makes the second claw.

Ami Claws - Fig 9
|

Ami Claws - Fig 10
|
Step 5: Take the working yarn over the yarn forming the claw and reinsert the needle in the same point that you brought it out of the foot from in Step 4 - this will secure the yarn forming the claw against the foot. Bring the needle out at point C on the underside of the third toe. (Fig 9)
Step 6: Pull the yarn through, insert the needle in the foot at point F and bring it out half way down the imaginary vertical line running between points C and F (Fig 10). Pull the yarn through so it tightens against the foot and makes the third claw.
Step 6: Pull the yarn through, insert the needle in the foot at point F and bring it out half way down the imaginary vertical line running between points C and F (Fig 10). Pull the yarn through so it tightens against the foot and makes the third claw.

Ami Claws - Fig 11
|
Ami Claws - Fig 12
|
Step 7: Take the working yarn over the yarn forming the claw and reinsert the needle in the same point that you brought it out of the foot from in Step 6 - this will secure the yarn forming the claw against the foot. Bring the needle out again in exactly the same place that you first inserted it into the foot at the start of Step 1. (Fig 11)
It’s very important to make sure that the needle comes out in exactly the same place as it was first inserted as you will be knotting the two ends together to fasten off and pulling the knot back into the foot in the following steps - you won’t be able to do this if the yarn ends come out of the foot at different points. (Fig 12)
It’s very important to make sure that the needle comes out in exactly the same place as it was first inserted as you will be knotting the two ends together to fasten off and pulling the knot back into the foot in the following steps - you won’t be able to do this if the yarn ends come out of the foot at different points. (Fig 12)

Ami Claws - Fig 13
|

Ami Claws - Fig 14
|
Step 8: Tie the two yarn ends together in a double knot. (Fig 13)
Step 9: Snip the excess yarn tails off about 1cm away from the knot. (Fig 14)
Step 9: Snip the excess yarn tails off about 1cm away from the knot. (Fig 14)

Ami Claws - Fig 15
|

Ami Claws - Fig 16
|
Step 10: You will now have a knot with two short ends sitting on the outside of the foot - in the next steps you will pull this knot back into the foot. (Fig 15)
Step 11: Insert the wrong end of your yarn needle to the side of the knot and swivel it in the direction of the arrow so that it catches on the yarn inside the foot and drags the knot under the surface. (Fig 16)
Step 12: Remove the pins - your claws are now complete. (Fig 17)
Step 11: Insert the wrong end of your yarn needle to the side of the knot and swivel it in the direction of the arrow so that it catches on the yarn inside the foot and drags the knot under the surface. (Fig 16)
Step 12: Remove the pins - your claws are now complete. (Fig 17)

Ami Claws - Fig 17
